8 Tips for Uploading Facebook Videos
Uploading videos in social media is one of the best trends in the internet today and many people are really captivated by it. This gives opportunities for people to upload their own video clips online and share it with their family, friends, and strangers all over the world. This remarkable technology has made it possible for anyone to have infinite fun without having to spend any amount of money. A lot of people like to record each and every moment of their lives using a camera, through this they could easily recall their memories anytime they want.
And just like any other videos sites all over the internet today like YouTube and Vimeo, uploading videos of anything on Facebook is not difficult thing to do anymore. By reading below, you will learn some facts related with uploading videos on Facebook.
- Part 1: Facebook Supported Video Format/Size Limit/Time Limit
- Part 2: Convert Videos In Order To Be Facebook Supported
- Part 3: Troubleshooting Tips for Facebook Uploading Problems
Part 1: Facebook Supported Video Format/Size Limit/Time Limit
If you are having trouble uploading videos on Facebook, there might be simple reason for that. The format of the video you are trying to upload might be not can’t be supported by the website. First, you have to make sure that the format of the video you are trying to upload is in the format of any of the following: .mp4, avi, .mov, or .mpg. Facebook can support almost all of these video file formats, but it is suggested to use .mp4 in uploading your videos.
Another trouble Facebook users are usually facing is uploading files beyond the maximum file size Facebook allows uploading. Before uploading your videos, check twice if your video is below the maximum file upload size of 1G.
Videos are commonly large file sizes, so they could take more than few minutes to completely upload depending on the speed of your internet and the length of the video you are trying to upload. A 10 up to 100 second videos should only take few minutes to be ready. The time or length limit for Facebook is 20 minutes in maximum. If you are trying to upload a longer video, you should expect waiting for a little bit. You have to keep in mind that processing means that it’s recoding itself for it to be playable on the Facebook page. It usually takes a little because for the known fact that the Facebook website is one of the most used websites all over the World Wide Web.
Part 2: Convert Videos In Order To Be Facebook Supported
Facebook allow us upload video clips to share it to the world. Though uploading videos is a simple thing to do, some users tend to encounter issues related to the limited video formats supported by Facebook.
If you are not sure if your video trying to upload can be supported by Facebook, you can always convert it to MP4 format that is recommended in uploading your videos. To be able to do that, you should use a video converted. One of the easiest ways to do that is to download and install Wondershare Video Converter for free.
Below is the step by step process converting your video file into MP4 format:
- Step 1: Download the software from the following links.
-
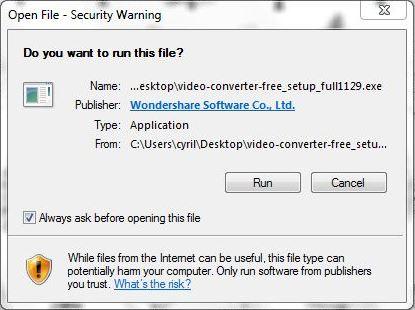
Step 2: When finish downloading, click on the installer you downloaded and wait for the confirmation message to pop up and click Run.

-
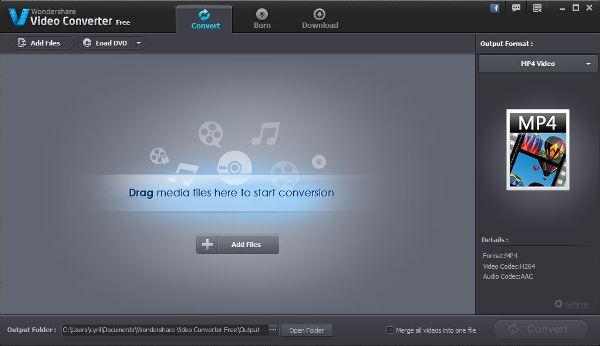
Step 3: When the installation is complete, open the software and click on Add Files or Drag the video file you want to convert. Select MP4 to be the output format.

- Step 4: Wait for the conversion to be completed. This should only take few moments; the length of the time you have to wait is depending on the size of the file you want to convert.
- Step 5: When finish, a notification box will pop out at the bottom right of your screen and your file is ready to be uploaded on Facebook.
Tip: In addition to the vital conversion ability of this software, this also offers in-program editing purposes such as cropping, trimming, merging, rotating, adding subtitles, watermarks, and a lot more to improve your digital enjoyment and add more personal touch to your video.
Part 3: Troubleshooting tips for Facebook uploading problems
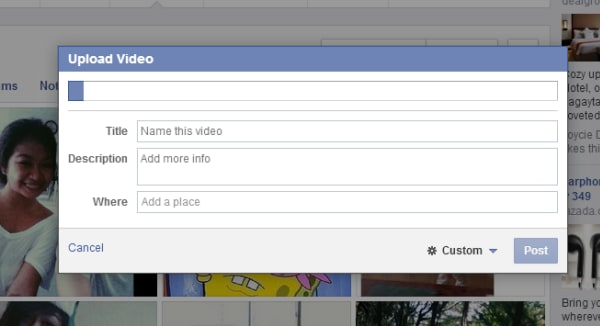
You are able to upload videos to your Facebook account in the same way how you upload your photos in the site. Simply click on Add Photo / Video that could be found at the top part of the Facebook homepage or your profile page, select Upload Photo/Video on the left side of the two columns and select the video file that you would like to upload from your computer. You also have the choice of recording a video with your webcam, or if you’re using your mobile phone, you can use it to record a video.
![]()
Though the process of uploading videos on Facebook can be really simple, there are some issues that you can encounter throughout the process that cause for the uploading to be unsuccessful.
One of the most common problems people encounter when uploading videos to Facebook is the inability for the video to upload automatically when trying to upload it on timeline. So if you are having this problem here is the step-by-step of the alternative way of uploading your video:
-
Step 1: Go to your profile and click on the Photos page.

-
Step 2: Click on the Add Video button at the upper right side of the page.

-
Step 3: Choose the video file you want to upload.

-
Step 4: The video will start uploading and just wait for it to complete.

Tip: Uploading your video can take from few minutes to hours depending on the size of the video and the connection speed of your internet. You also have to be aware that Facebook will still process the video after you’ve uploaded them, so it essentially means that your video wouldn’t directly available even the uploading is complete.
Top 5 Common Problems Encountered in Uploading Videos on Facebook
If none of these issues applies to your problem regarding uploading videos on Facebook, the site provides a page where you can find solution to your problems. Facebook gives warning messages when they remove videos from your page.


